I had one in the 80�s that someone had put a big nut �n bolt through the door as the bracket had failed completely and there was a fatigue crack going down the skin.
Too much flex between the frame and skin. Don�t think it helps much when the top of the doors start flapping at speed.
-
Nasty crack
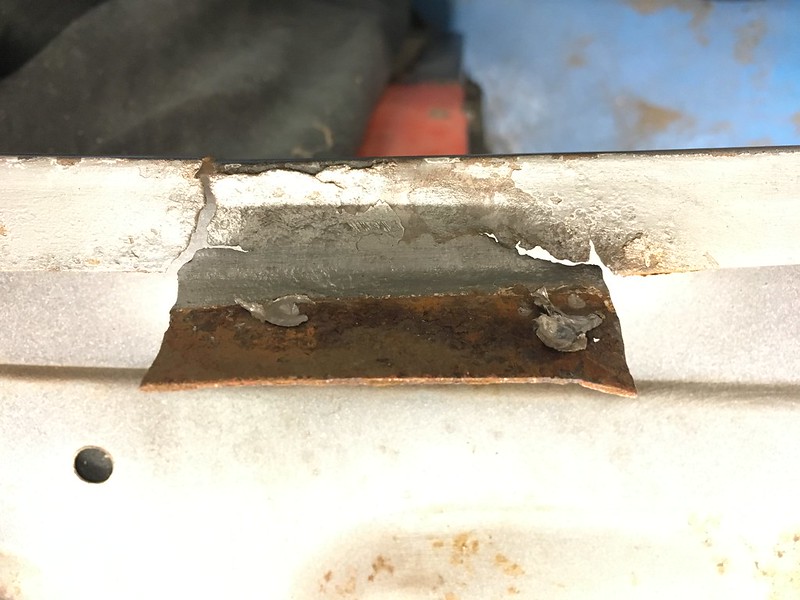
While waiting for the bottom repair section I had a look at a nasty crack in a weird place - where the inner and outer skin join under the quarterlight frame.
 IMG_7469 by Chris Rigler, on Flickr
No idea why it goes here? Anyone?
 IMG_7496 by Chris Rigler, on Flickr
No Choice but to cut it out.
 IMG_7502 by Chris Rigler, on Flickr
Made up a new section and fixed it in.
 IMG_7506 by Chris Rigler, on Flickr
Looks a bit better now.
 IMG_7507 by Chris Rigler, on Flickr
Leave a comment:
-
Shut that door!
Walking trip was aborted due to the horrendous weather forecast so retreated to the garage to have a go at the driver's door.
 IMG_7495 by Chris Rigler, on Flickr
The bottom had a repair on top of a repair
 IMG_7472 by Chris Rigler, on Flickr
So off with the skin
 IMG_7478 by Chris Rigler, on Flickr
Yuk! Pretty manky so ordered a bottom repair section from Expressed panelsLeave a comment:
-
Yes - I did cut it in but didn�t look great. Plus that quarter had some historical damage and would have never had looked mint. Hence the decision to fit one of Magnum�s finest. Glad I robbed that bank.......")
Leave a comment:
-
Looks like some good work here, looks like your doing the right think by replacing the whole rear 1/4 panel, thought you was going to cut and piece it in.
I take it thats a magnum panelLeave a comment:
-
Rear quarter stripped
 2 by Chris Rigler, on Flickr
Ahhh - that's better!
 IMG_7443 by Chris Rigler, on Flickr
Leave a comment:
-
Leave a comment:
-
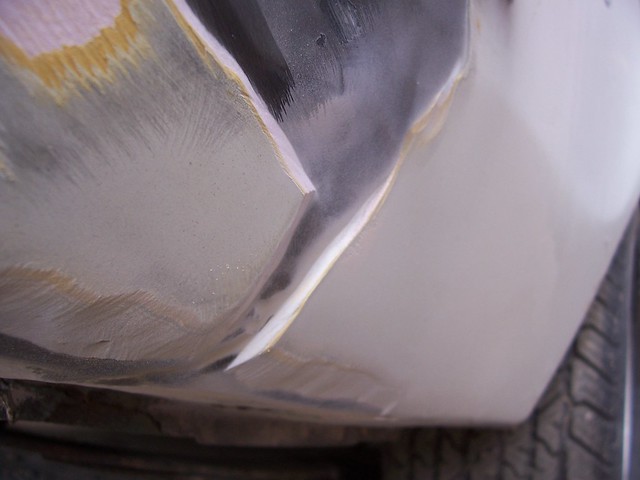
This wing had been damaged at some time in its life and, when stripped, a frightening amount of filler was found. After getting it back to bare metal and a little panel bashing, it wasn't too bad but would still need filling and I didn't want that. So a sharp intake of breath and a dig into the bank account resulted in the delivery of a new full rear quarter panel.
 Filler 3 by Chris Rigler, on Flickr
 Filler 2 by Chris Rigler, on Flickr
 25-19-51-1-2 by Chris Rigler, on Flickr
Leave a comment:
-
Not too bad for an amateur - but still not happy. So invested in a new inner tub courtesy of Mr Magnum Panels.
 IMG_7179 by Chris Rigler, on Flickr
 IMG_7188[1528] by Chris Rigler, on Flickr
 IMG_7189 by Chris Rigler, on Flickr
 IMG_7192 by Chris Rigler, on Flickr
Leave a comment:
-
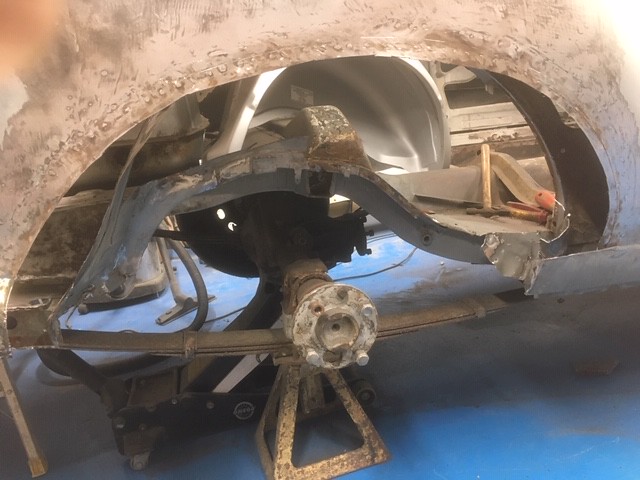
With the arch removed, I found the inner tub had the same problem. So set about doing the same thing here.
 IMG_7174 by Chris Rigler, on Flickr
Leave a comment:
-
First thing to address is the rear arches. They have had repair sections but they have been overlapped, not butt welded. So I cut through the arch with the intention of making a nice, strong seamless joint.
 IMG_7172 by Chris Rigler, on Flickr
Leave a comment:
-
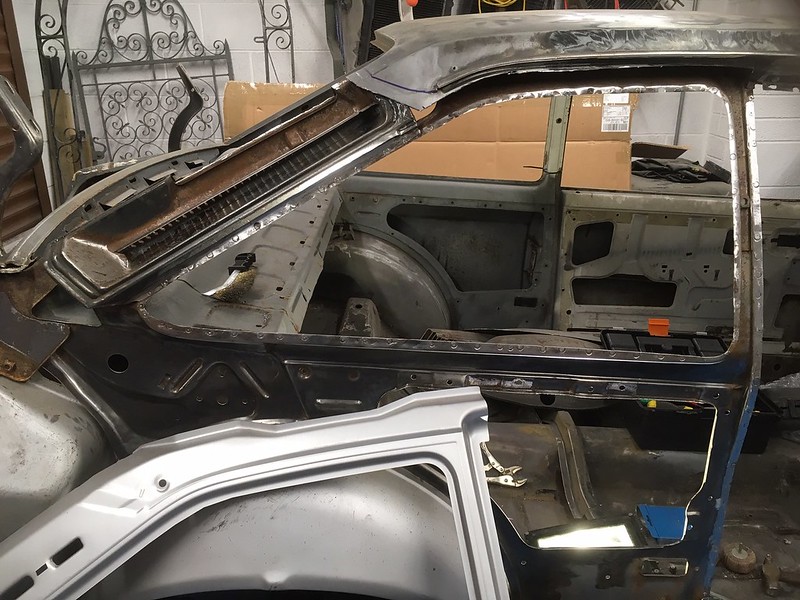
After 6 years outside, I forgot how far I was with this project so took a closer look at what I'm working with.
 IMG_7153 by Chris Rigler, on Flickr
 IMG_7160 by Chris Rigler, on Flickr
 IMG_7166 by Chris Rigler, on Flickr
 IMG_7163 by Chris Rigler, on Flickr
Leave a comment:
-
I'm back! I'm staggered to see that it's been six years since I was last on. Since then I have retired, built an annexe to the house - and I have a new garage!
The poor old RS has unfortunately been stored outside during the building work and is a little the worse for wear (boot full of water) but hopefully I can find some time now to get on with the resto.

Leave a comment:
-
youve done work on that well done for keeping at after all this timeLeave a comment:


Leave a comment: