Announcement

Collapse
No announcement yet.

Time to get those Rear Springs fitted!

Collapse
X
 
  • Filter
  • Time
  • Show
Clear All
new posts

  • #31
    Originally posted by laney View Post
    hi tim, looking good there i dont think the wife would let me grow a axle casting in the kitchen
    Hi Steve, It was'nt a problem growing the axle casing in the kitchen, the problem lay getting it into that dishwasher to get the crud off.

    Originally posted by dasadrew View Post
    Some good work going on there!

    Always nice to see someone knuckling down and doing bits himself rather than carting it all off to a company for doing
    I did originally get the bodywork done for me on the car, as there was just too much work involved for me to take on. It would have taken me a long time to do, but stripping it down to a rolling shell, painting the bits, and most mechanical work I have enjoyed doing. Just enjoying trying to make it a bit better every year.

    Originally posted by kelps View Post
    Doing a good job there What paint you using for the axle+bits? looks very nice.
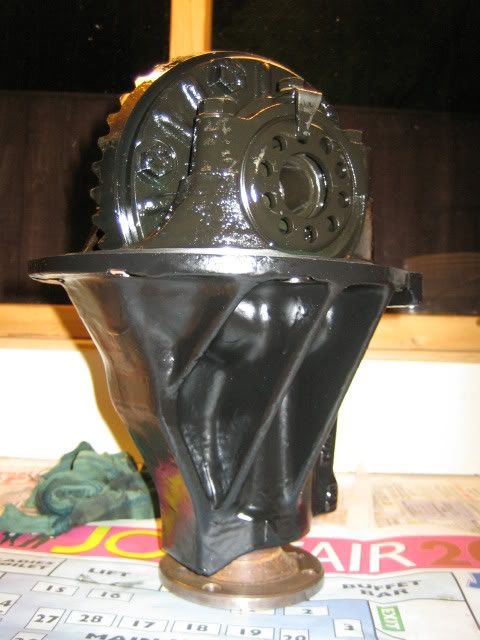
    As mentioned earlier, I am using Hammerite Satin Finish Paint. Although it does not require a primer, I like to include a coat. Gloss would be more water repellant but I believe the satin looks right.

    Many Thanks for your nice comments guys.

    Comment


    • #32
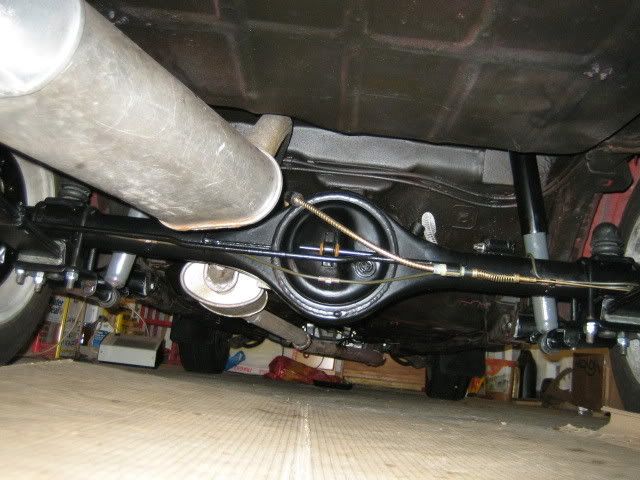
      Earlier this week, I finished making the brake pipes up and placed them on the casing to see how they looked. These being made out of steel proved too difficult for the pipe flarer which I had borrowed, and had to be finished off on an alternative flarer.


      Next Job: Last paint job, the springs!

      Tim.

      Comment


      • #33
        Quality job Tim.....don't make it too good to drive though


        My cars in the VbGarage

        Comment


        • #34
          looks really nice, just purchased a second hand Mexico axle off ebay this weekend, If get mine lookin half as good I'll be happy, was wondering what you used to paint yours with.

          Comment


          • #35
            Originally posted by lynx View Post
            looks really nice, just purchased a second hand Mexico axle off ebay this weekend, If get mine lookin half as good I'll be happy, was wondering what you used to paint yours with.
            Originally Posted by alminera
            Looking very nice there Tim......what did you paint it with? ......
            Hammerite Products: Brush on Rust-Killing Primer, Brush Satin Black and a final coat of Satin Spray.

            Hello Lynx, Thanks for the nice comment.
            At first glance at the axle casing I thought it would not be too bad cleaning it up, but it still took hours of preparation to get it right, so many bits attached to it! Good luck with yours.

            Tim.

            Comment


            • #36
              Update of what I've been doing.


              Diff painted!


              Leafsprings: These are the new, but on preparation I had to strip the old paint off, seemed sad to loose the part numbers so I decided to replace them.


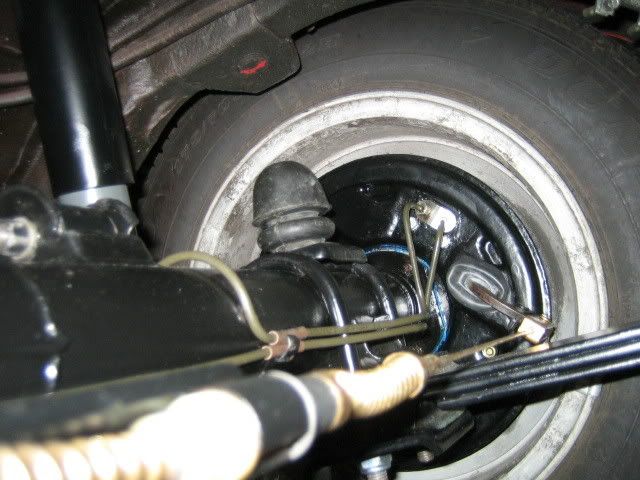
              Finally got everything back together, which is now showing up the condition of the wheels. I'm waiting for the warmer weather to do these!


              Yes, the Hylomar needs cleaning off here. I decided to fit a gasket to help prevent the wet getting to the bearings.


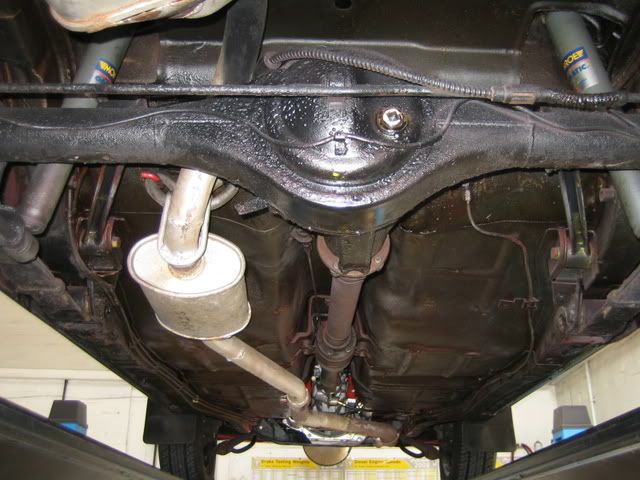
              Another shot of how it was!


              Can you spot the difference in height?

              Before:


              and after:


              The spring height does not look much here, but there is now a curve in the spring once again, and the car is not down on it's back end any more!

              Tim.

              Comment


              • #37
                Cracking work Tim Love the attention to detail with the part numbers

                Concourse in 2009 then ?


                My cars in the VbGarage

                Comment


                • #38
                  Originally posted by Aled View Post
                  Cracking work Tim Love the attention to detail with the part numbers

                  Concourse in 2009 then ?
                  Yep, it will be lined up with the stiff competition from cars like yours!

                  No, this ones strictly staying on the road, It will be getting a fresh coat of Waxoyl soon, to preserve the work I have done. Even the part numbers will be Waxoyled I'm afraid.

                  Comment


                  • #39
                    that's a cracking job you've done there

                    Comment


                    • #40
                      looking good there tim

                      Comment


                      • #41
                        Looking good. What did you use on your brake pipes / clips, the brown and how did you get your lines so straight. Thanks Andy
                        Andy

                        Comment


                        • #42
                          Originally posted by marky4 View Post
                          that's a cracking job you've done there
                          Thanks Marky,

                          Not quite the same impact as if I had painted/detailed the floor pan, but I want to be able to continue to use it on the road without the worry of a bit of dirt under it and the fear of it rusting.

                          Originally posted by dale View Post
                          looking good there tim
                          Thanks Dale,

                          Got to make an effort to improve the car a bit, now that there is fierce competition from the broadstripes these days!

                          Originally posted by andym View Post
                          Looking good. What did you use on your brake pipes / clips, the brown and how did you get your lines so straight. Thanks Andy
                          Thanks Andy,

                          Fords used very thin orange tube, but some of them had been lost on the previous replacement pipe, so the nearest I could find was TV coaxial cable sleeve, a little bit thicker but does the job and sort of goes with the colour of the pipes a bit!

                          I started off by cutting a piece of pipe the correct length + allowing for the swages at each end. After swaging I straightened all the kinks out of the pipe to get it perfectly straight, then worked on it putting the bends in carefully making sure each end balanced up evenly, except for any parts that are supposed to be different. I was lent a pipe bender which I have never used before, but I did not like it as it had an unnecessary sharp edge which marked the coating on the pipes a bit, no matter how careful I was doing it. I ended up bending just by hand as I always had done in the past and that worked fine.

                          Tim.

                          Comment


                          • #43
                            Thanks for that Tim.. Just stunning.
                            Andy

                            Comment


                            • #44
                              Old Thread but very good if you are restoring a mk2 escort
                              sigpic

                              Comment


                              • #45
                                yes very good thread used to get a lot of threads like this on here ,but now you dont . i think most on here dont like to share

                                Comment

                                Working...
                                X