-
sigpic -
..........................Yes it did
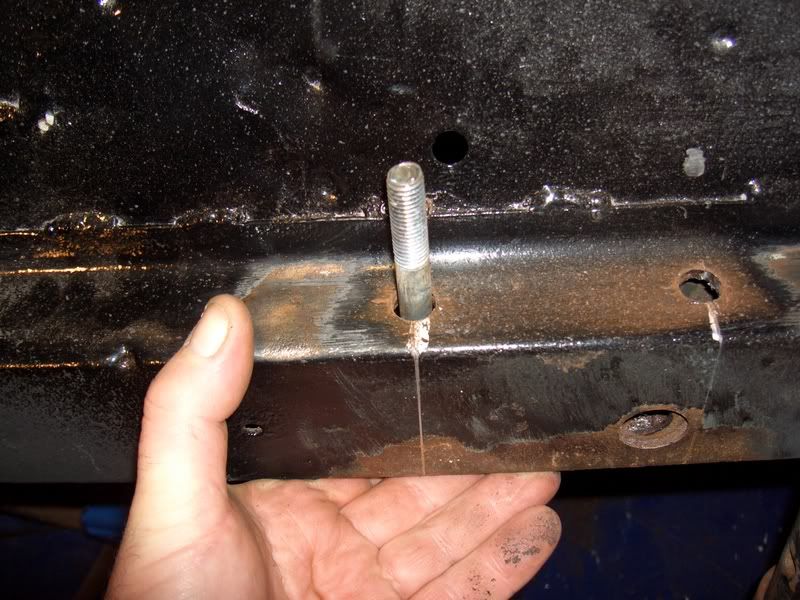

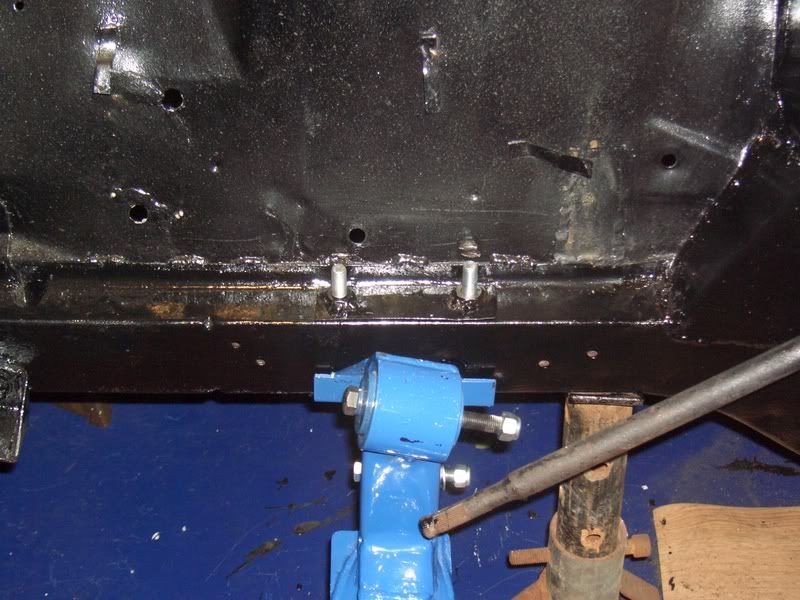
Next thing was to sleeve the bolts with some steel tube to prevent the chassis compressing when the bolts were done up tight.
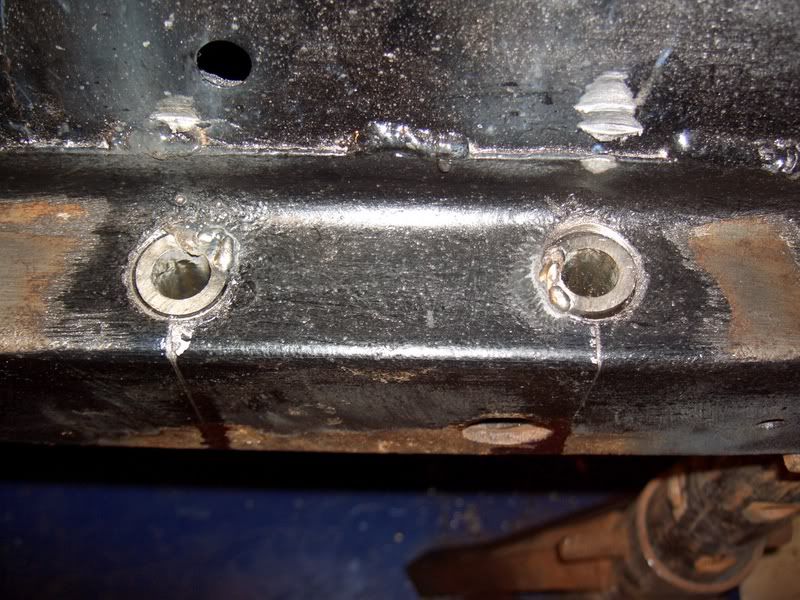
a little tip i was told was to enlarge the TOP hole only and insert the relevant steel tube so that it locates on the upper inner section of the chassis rail (As opposed to 'through drilling' - a trick done by the works teams so im told by "a man" at Castle Combe and to then spot weld the tube in place thus giving additional support and firm location, thus off i set to enlarge the upper holes - the pic shows what i mean, although due to the angle of the pic and the space between the holes it does look as though they are not square - it is an optical illusion, they are perfectly aligned.
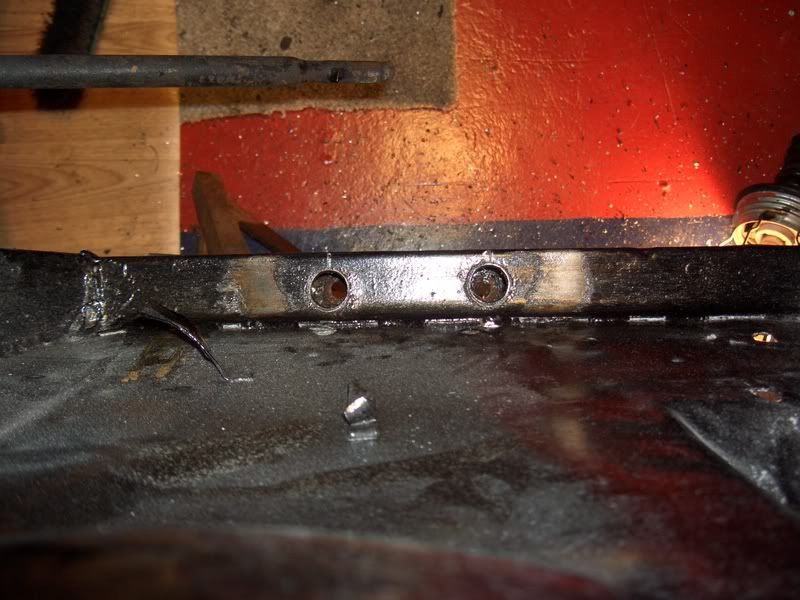
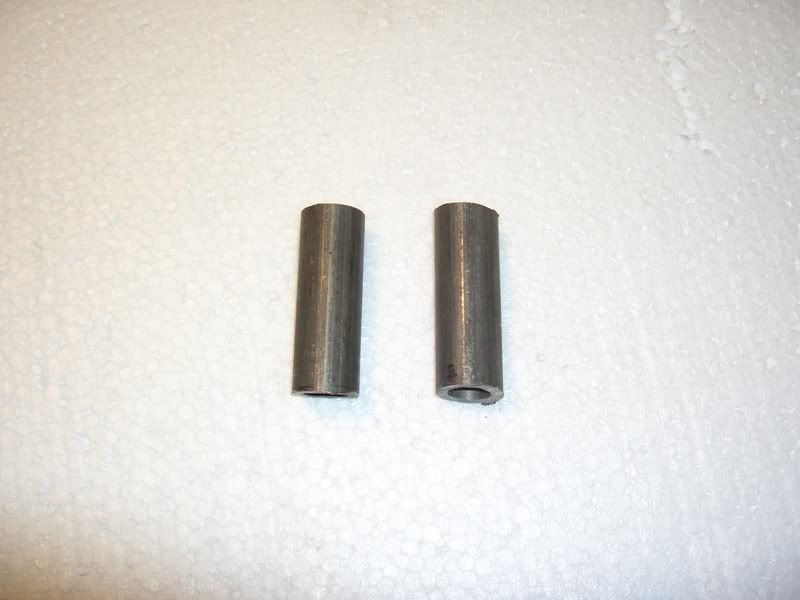
A couple of steel tube inserts were cut to length, (although the ones in the pic have to be squared off first) and then inserted into the chassis rails, followed by a few spot welds to secure.
more to follow........
cheeRSsigpicComment
-
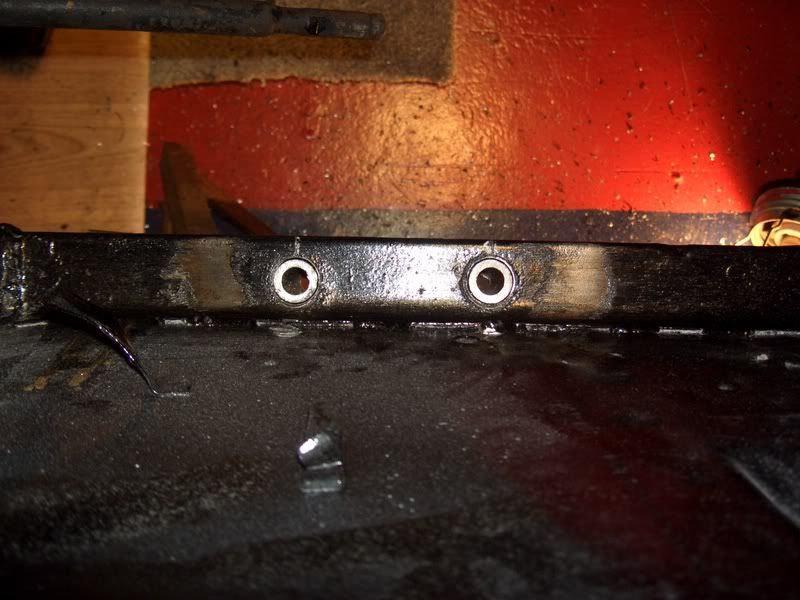
once checked (again) for alignment the Steel insert tubes were mig welded (i.e Pigeon shit welded) into position and then the weld ground off

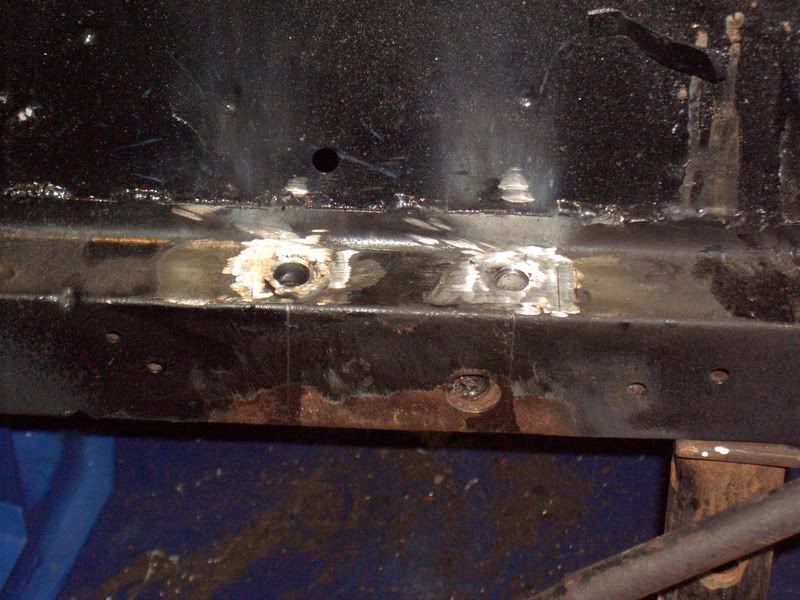
next up, clean off and apply some paint,
cheeRSsigpicComment
-
i love the way GJ uses a Dewalt drill, but puts a JCB sticker on it so no b'stard will nick it !!!!!!!
Comment
-
-
Thats genuine gorilla welding that ! UGLY BUT STRONG!!!
Comment
-
yep,Originally posted by jim gracie View Post
does the job, not bad for a man with only one right arm
cheeRSsigpicComment
-
nice job there GJ, welding whats that thenComment
-
-
Me too,one right arm that is ! and damn i don,t beleive it f---ing one left one as well !Originally posted by graham John View Post Good job there GJ keep up the progress,be finished in no time at this rate.
Comment
-
Originally posted by Dave1800BDA View Post
whey ayyyy, and in Halesowen, custom could pick that up for his noddy car
cheeRSsigpicComment
-
picked up a Rad Tek radiator at autosport, couple of fire extinguishers, some alloy rack mounts, and a 'breather for the ole girl,
look forward to fitting em soon
and some bubble Wrap for Basil

cheeRSsigpicComment
-
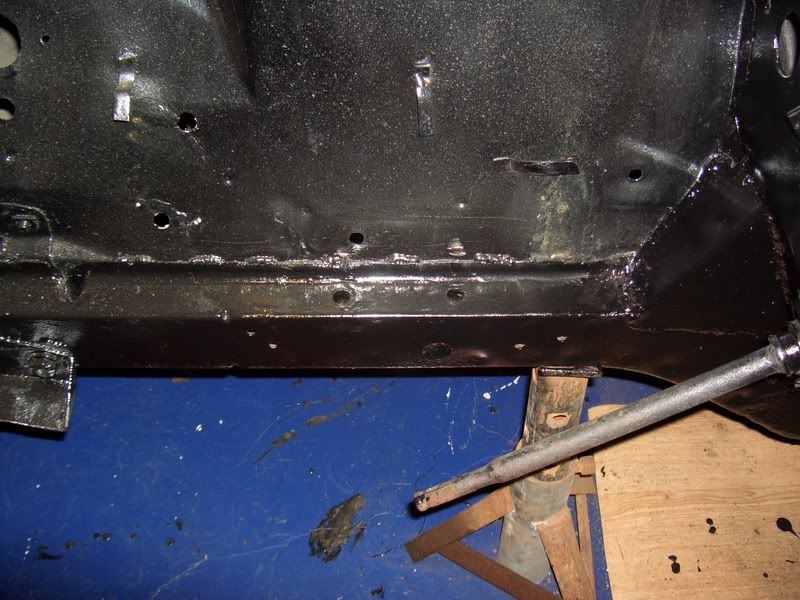
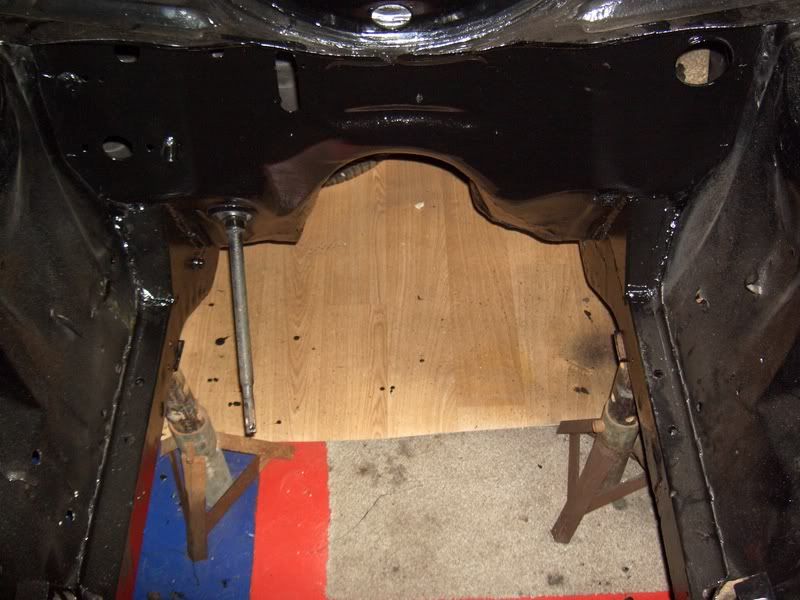
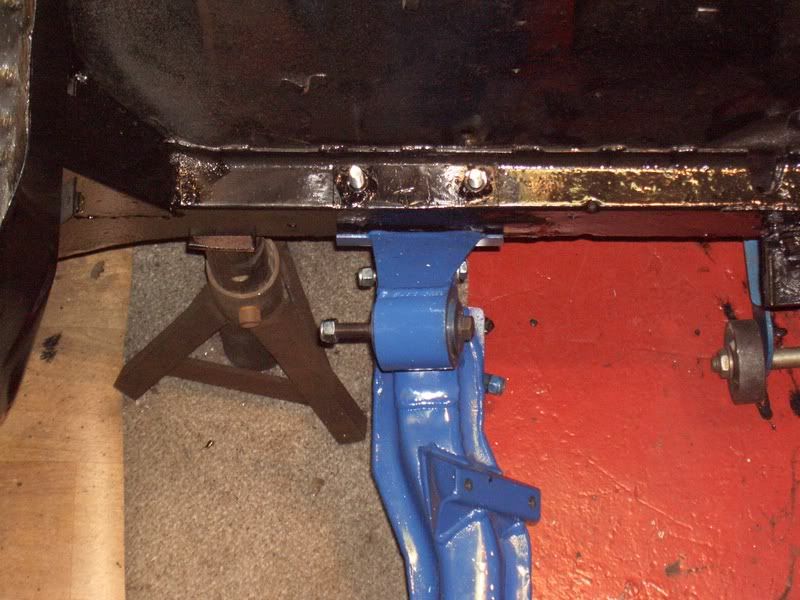
Right, where were we then
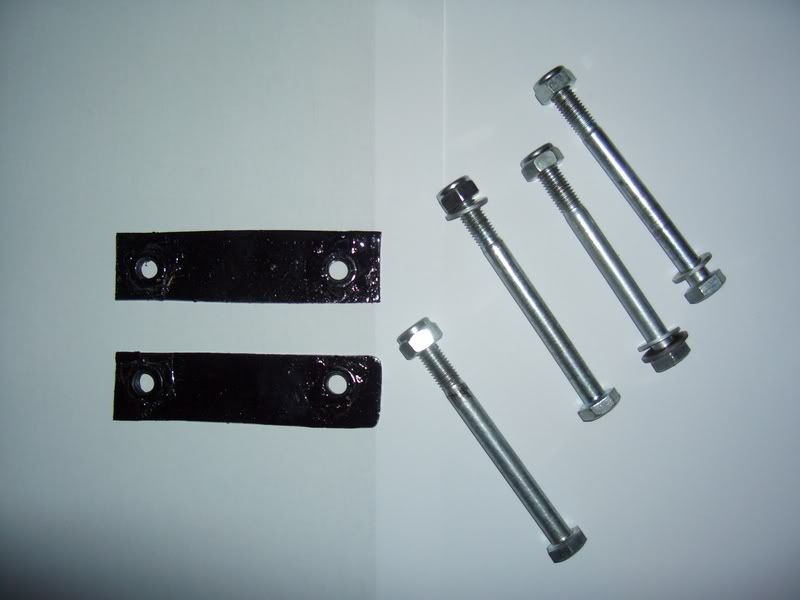
aah, i remember, then it was time to make up a couple of plates with some 'captive' weld nuts on them so that when the tile comes to bolt the Xmember the plates would add some 'load' for the top chassis rails and also assist in the security of the load.

--- I may either lock wire or simply add another lock nut to the threaded end to ensure they do not unwind.
bolts used are 12mm wide / thick, and 225mm long, and high tensile 'stainless' - should do a treat.
off back now to fix it all up in place
cheeRSsigpicComment
-
looking good
�The great thing about the sierra is, it has all the mechanical simplicity of a knife and fork� Quentin WillsonComment
-
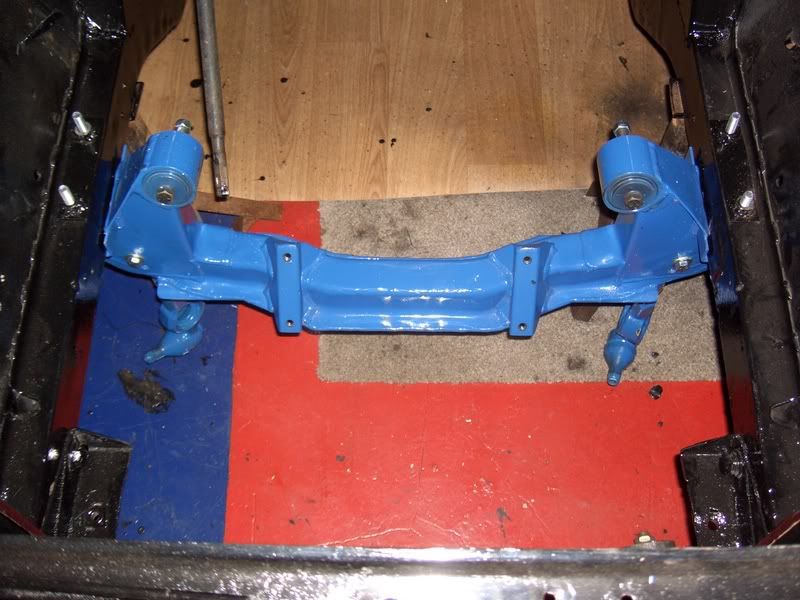
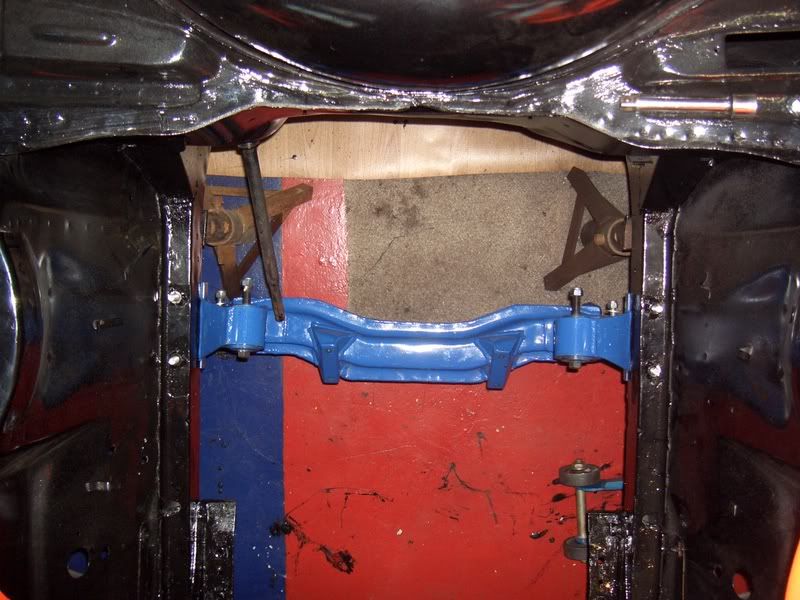
with all that done, now was time to bolt it all in place, the engine bay had been 'full', stripped, prepared, and now, finally, time to rebuild........
And how about this for a picture, Google earth eat your heart out
Next week is crocodile wrestling week, i.e. attempting to get the anti roll bar / DW kit / Anti dive and the Adjustable TCA all into place with poly bushes, it'll end in Bloodshed, probably mine on the garage floor,
be back soon,
cheeRSLast edited by graham John; 13-01-2007, 23:28.sigpicComment
 Tweet
Tweet

Comment