Announcement

Collapse
No announcement yet.

The Black Beauty

Collapse
X
 
  • Filter
  • Time
  • Show
Clear All
new posts

  • whey hey, top man, its good to see her again mate, you must be chuffed, nice video too, not to sure about The Hoff's singing, lol

    have a nice christmas mate

    Comment


    • Originally posted by anddon View Post
      whey hey, top man, its good to see her again mate, you must be chuffed, nice video too, not to sure about The Hoff's singing, lol

      have a nice christmas mate

      cheeRs guys,
      yes, its all finished, but didnt llike it so have sent it back to be returned to standard........


      patience my friends,

      cheeRS
      sigpic

      Comment


      • end of jan is looming boys

        Comment


        • jesus, thank christ for small miracles, have been following your tale of dissapointment and heartache for months and as a preparation and race workshop owner i have been feeling so very guilty about the length of time this has taken to complete.(makes us all look bad)
          if we took 2 months to do the same amount of work we would be embarrased and for ever appologising.
          i'm soooo glad it has worked out finally, and look forward to seeing photos of the finished car ,as i'm sure that it will be a credit to not only your skill
          and determination, but to your immense patience as well,
          good luck from here on,

          cheers pete c

          Comment


          • Originally posted by pete c View Post
            jesus, thank christ for small miracles, have been following your tale of dissapointment and heartache for months and as a preparation and race workshop owner i have been feeling so very guilty about the length of time this has taken to complete.(makes us all look bad)
            if we took 2 months to do the same amount of work we would be embarrased and for ever appologising.
            i'm soooo glad it has worked out finally, and look forward to seeing photos of the finished car ,as i'm sure that it will be a credit to not only your skill
            and determination, but to your immense patience as well,
            good luck from here on,

            cheers pete c

            thanks Pete for the kind words, was beginning to think id never get it back.

            now, on with the resto and the pics...............


            cheeRS
            sigpic

            Comment


            • and so we resume,

              as you have gathered, after 18 months away having some minor panels replaced the car is now back safely in the garage at home


              First thing that needed doing was to clean 18 months of Workshop dust out of the car which was caked in it. Out with the dyson and go for it
              (angharad, dont dare tell mum!)

              At least now i could work in a cleaner area and this was important as i hate working in a mess.

              Having had a good look around the car, i was happy to now continue and my plan of attack (unlike Gaz !) was to start at the rear 
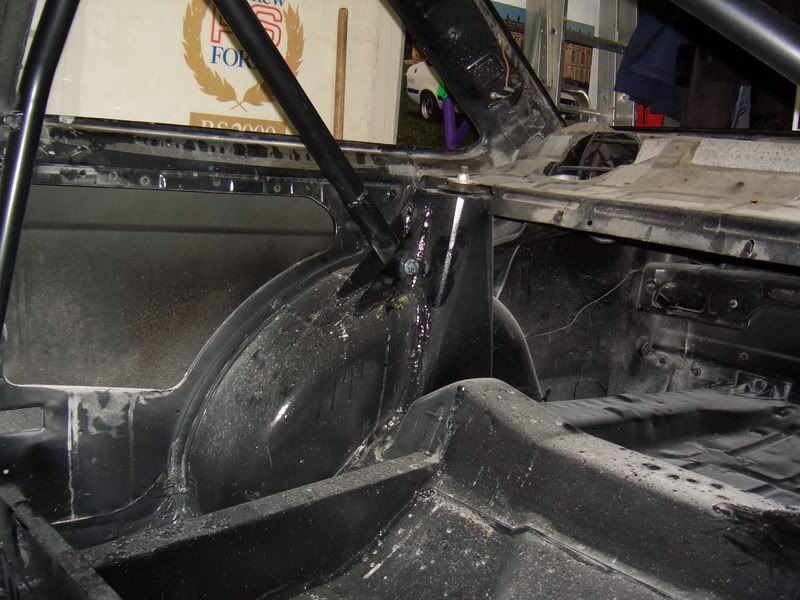
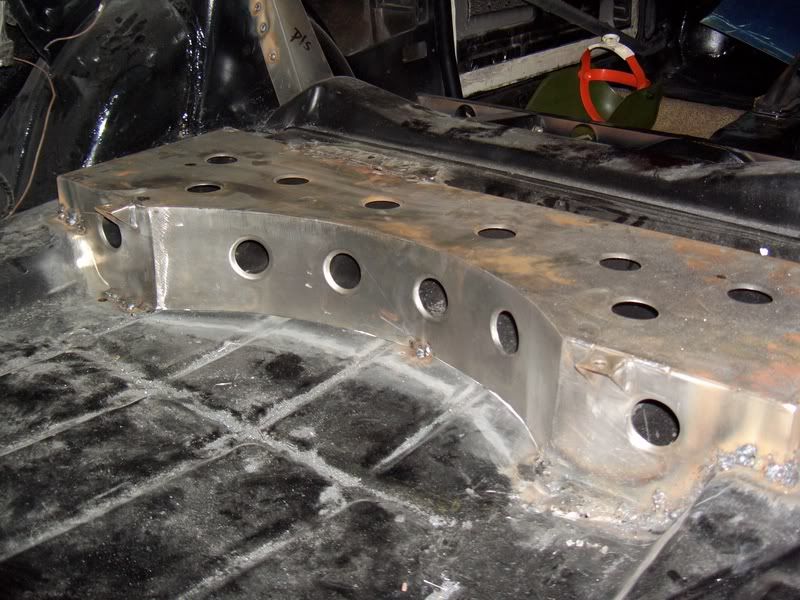
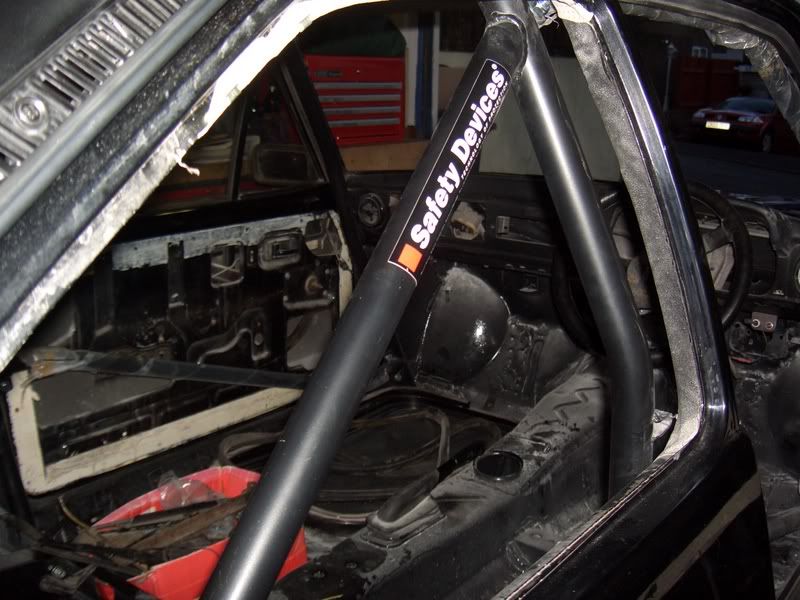
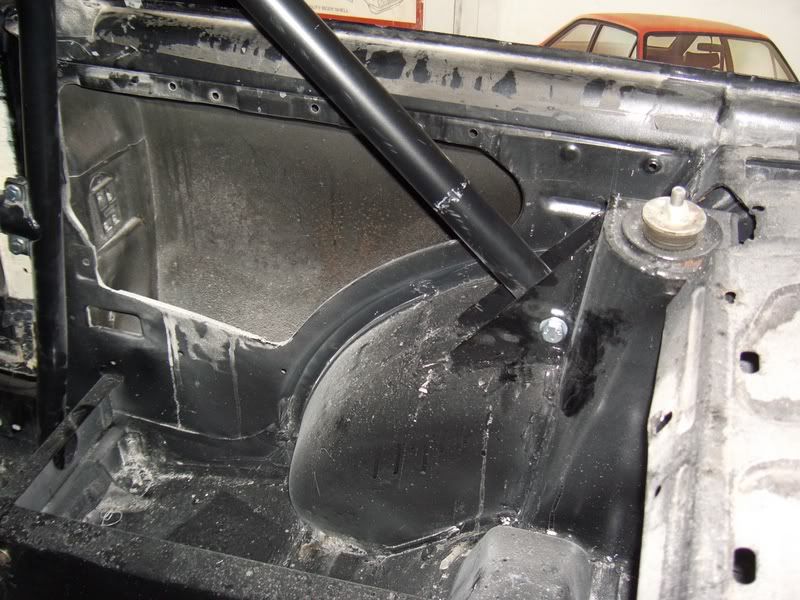
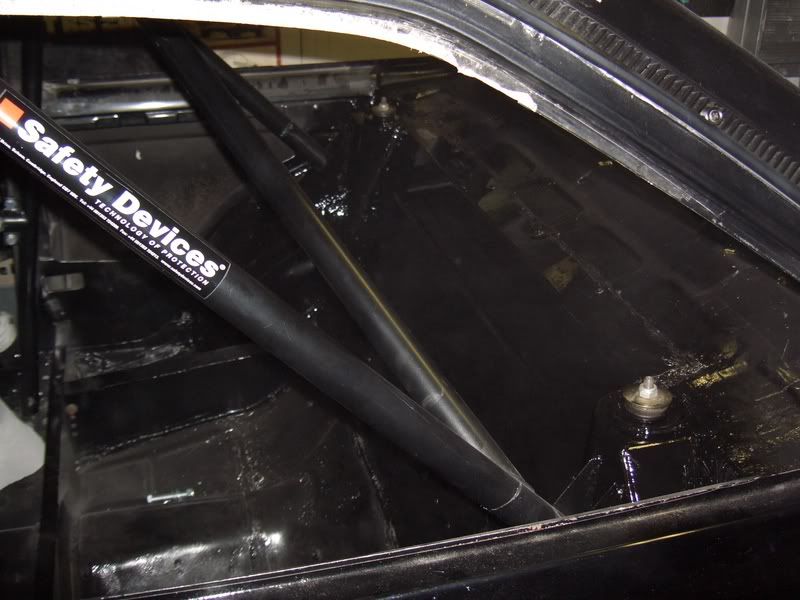
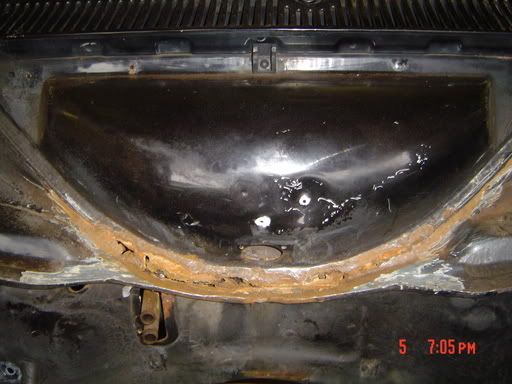
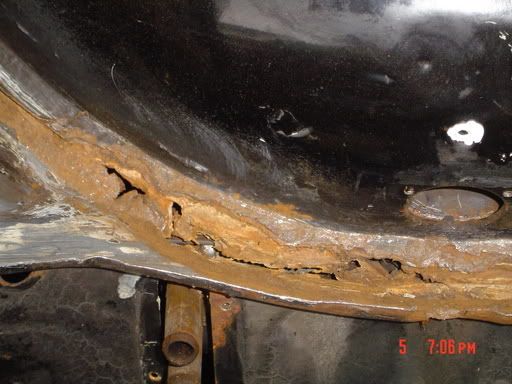
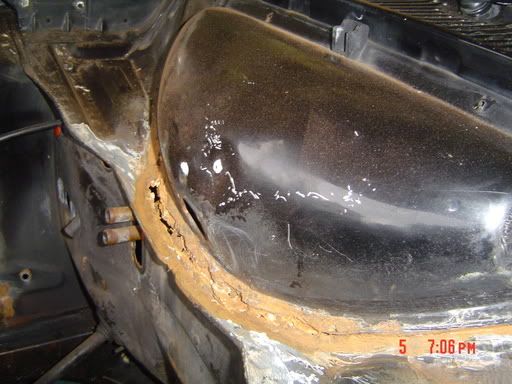
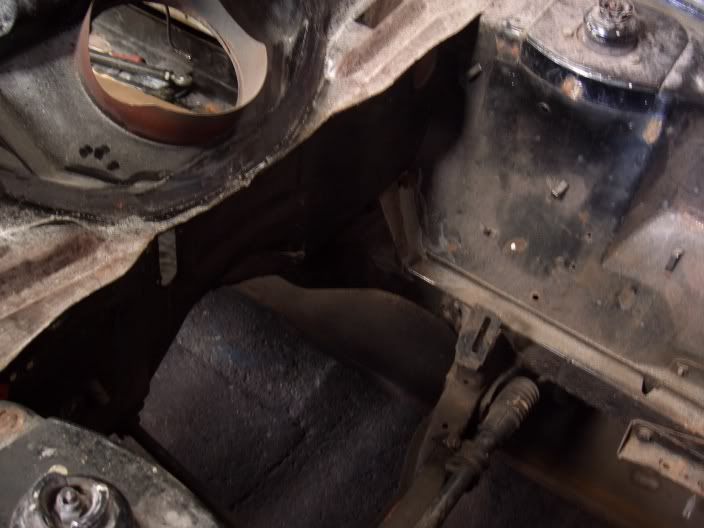
(ooh eerr missus) and gradually work to the front, and by sectioning the car into the following categories
              1 Boot
              2 ****pit
              3 Engine Bay
              4 underside

              this also helped in planning what parts i would need and also when.
              Externally, the car is OK (for now)therefore the boot area is first for attention. As the car will be used for stage rallying, it was important to start with the fireproof bulkhead and ensure that this was done properly, however the rear shelf was a complete mess with large speaker holes 'cut out' and also some unfinished work around the newly installed turets

              see original pic


              also, as well as not wanting to fall foul of the RAC scrutineers, i wanted the car to be as safe as possible for my / co drivers well being therefore considerable time and effort went in to making this correct

              see next section below,


              cheeRS
              Last edited by graham John; 01-01-2007, 17:07.
              sigpic

              Comment


              • first thing to go in was the Fuel tank platform, which was welded to the floor, and also the two fillet plates which fix to the turrrets (again welded in place)


                Despite looking quite straightforward, they had to be in the exact place as quite a lot of other fitments depended on their being 'right' - if the tank was wrong, then the rest of the 'boot' euipement would not fit (spare wheels etc) - see later on.

                The rear shelf was tackled next, the 8" speaker holes needed plating, welding in positionong and then sealing correctly. For this, i used a fibreglass matting / resin and then oversealed this with seam sealer (obtained from the local citroen dealer at Mega Bucks per cartridge, but it is intumecsant (Spelling) and overpaintable, therefore worth the money (although it was expensive!!)


                this was all left to seal / harden and then would be overpainted.


                maenwhile, i set to sorting out around the rear shelf / rear turrets and started to add some metal back into the structure (this area would require strengthening eventually and also the aforementioned fireproofing)


                more pics / update soon,


                cheeRS
                sigpic

                Comment


                • Keep it going Graham. Looking good there
                  Autumn Has Arrived by Kevin Frost, on Flickr

                  CHES'S UNDERSTUDY...........

                  Comment


                  • new plates / metal was welded in around the rear turrets / shelf area, and again seam sealed for protection. Now that this was done, the area could be smoothed off a bit and over painted.......................


                    next move is to fit the actual firewall itself and all the relevant pass through points for the loom,s Cables and fuel lines


                    cheeRS
                    sigpic

                    Comment


                    • shineeeeeeeey


                      cheeRS
                      sigpic

                      Comment


                      • The rear wire loom had to go in next, as this passes throught the firewall, however, some alterations to its more usual route were required, in addition to the addition of some extra wires for the fuel pumps (thanks Leon / Ricky mexit 
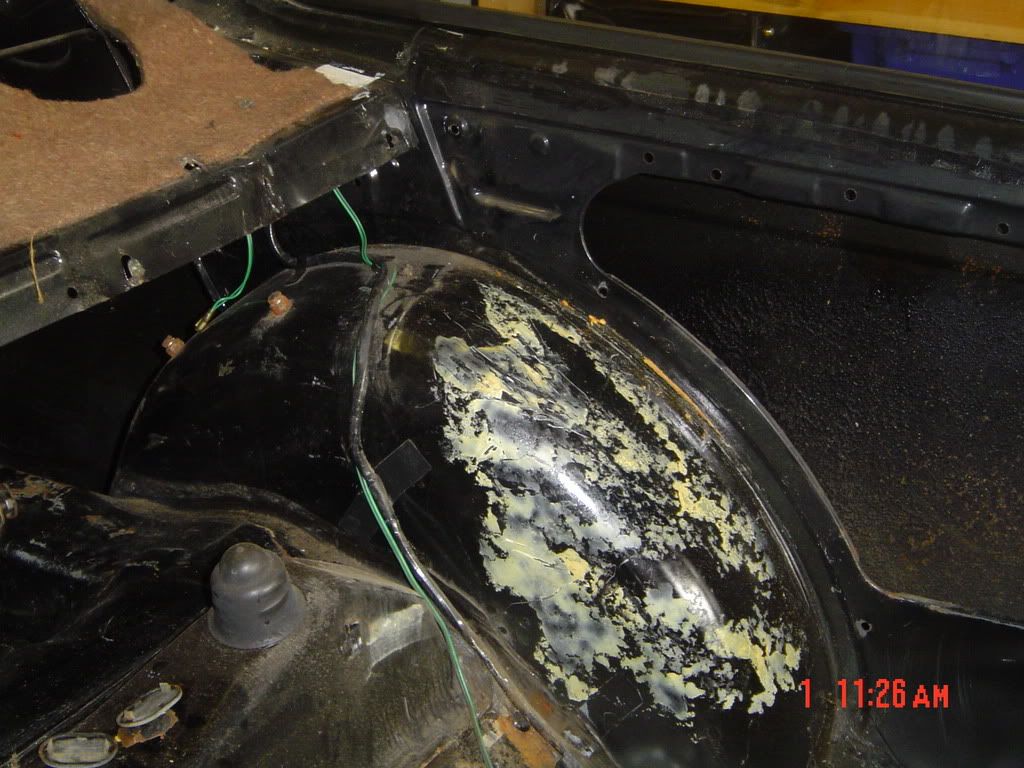
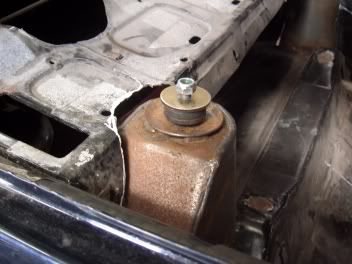
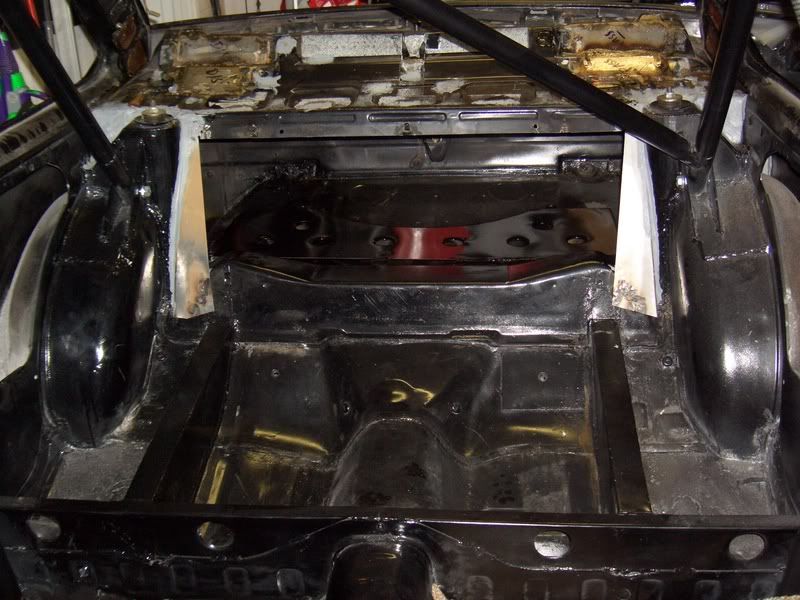
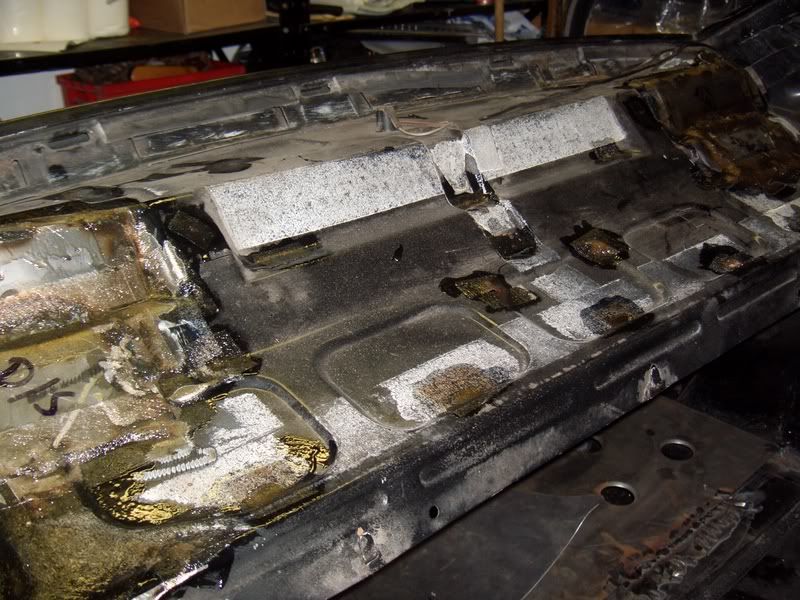
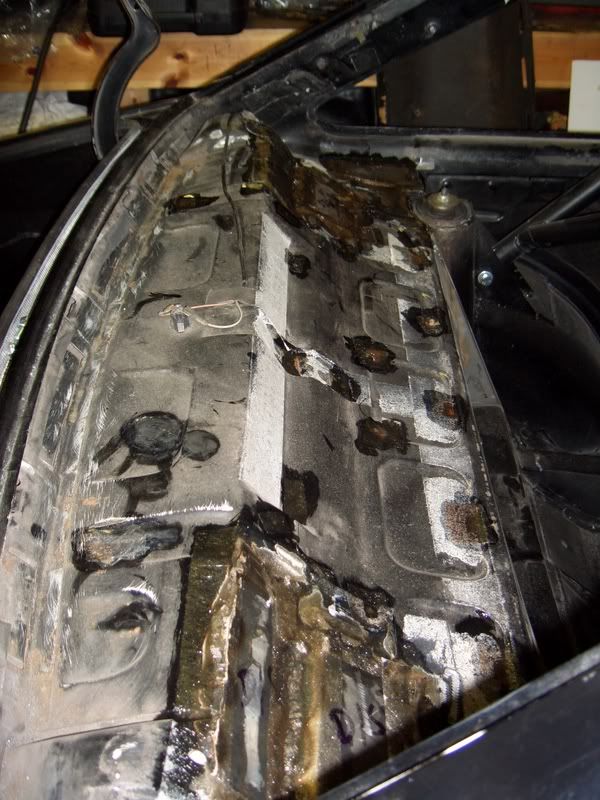
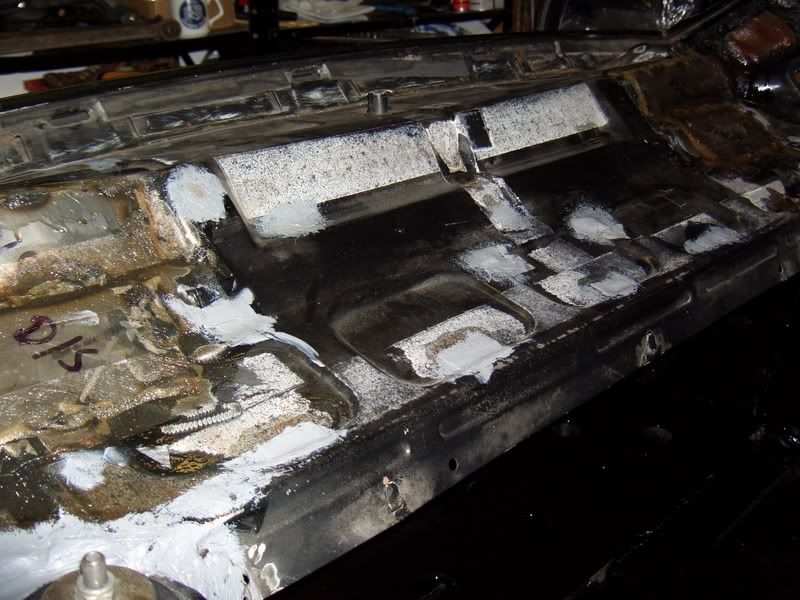
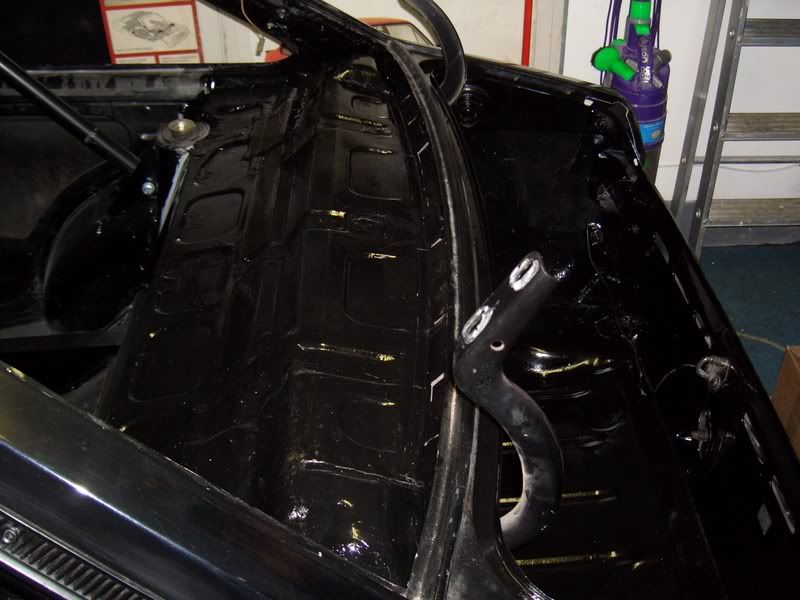
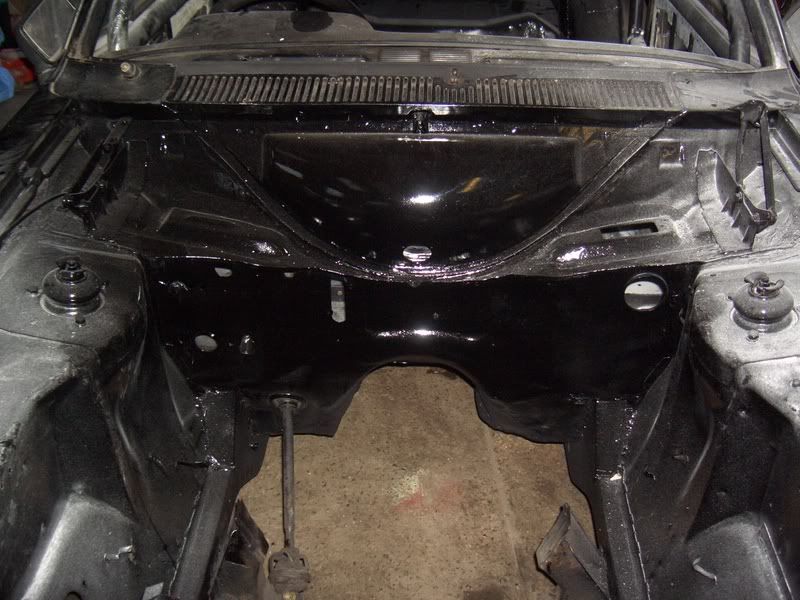
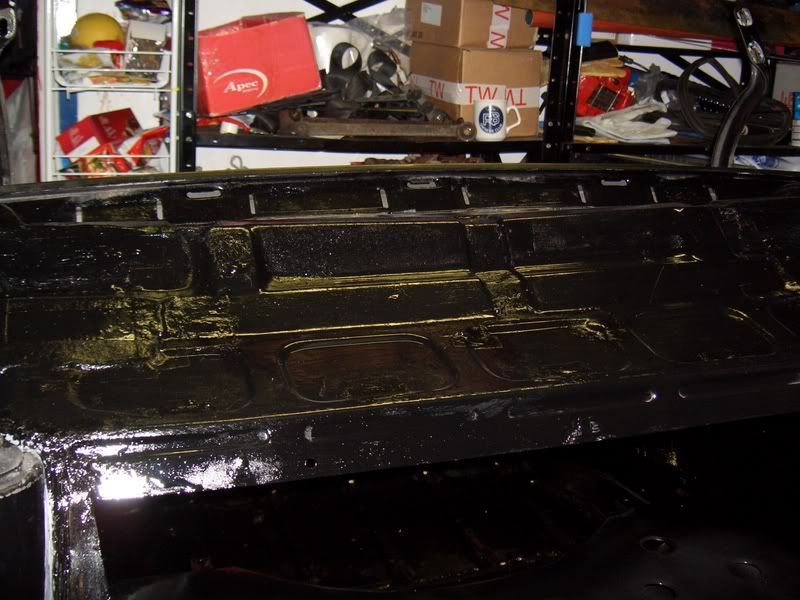
) and also re routing the HRW and interior light.

                        fitting the 'flitch' pieces between the wheel arches and the inner boot was a right pain in the arse, however custom shaped steel sections had been purchased and these were then 'pigeon shit' welded into position, seam sealed, painted and the wiring worked around this. Finally, the rear pillars were foam filled (for additional strength) and the various holes / vents seam sealed and painted.

                        and onto the Firewall itself, - a lot of work had gone into preparing the surrounding area to fix the firewall, if anyone tells you its a couple of hours work then they are either kidding, have not done it before, or have not done it properly (this was my Fifth build of a firewall) and my Firewall was bespoke for a turreted set up and upon offering it up was a perfect fit - thankfully i had taken time to get the other dimensions right. however, it still had to be seam seales to the leading edges, trimmed ever so slightly, offered up and then pop rivetted. I used large pop rivets and fixed every 50mm to ensure strength and also a tight fit between firewall / seam sealer/car body (note, again intumescant (spelling) seam sealer was used, overpaintable). Once this was done, pre determined holes were cut to alllow for the standard rear loom (with extra wires !), the Aeroquip fuel lines for fuel, and the main Battery feed, and the relevant fire proof gromets / sealant used.


                        Again,
                        just to make doubly sure, from inside the boot area all joints were sealed and checked for tightness.

                        all that was left was to basically give it a coat of paint to ensure it blended in with the rest of the boot / interior, and this was quite difficult (the firewall was Ribbed /Structured aluminium) to get the paint to adhere, however a quick word or two and i was pointed in the right direction 
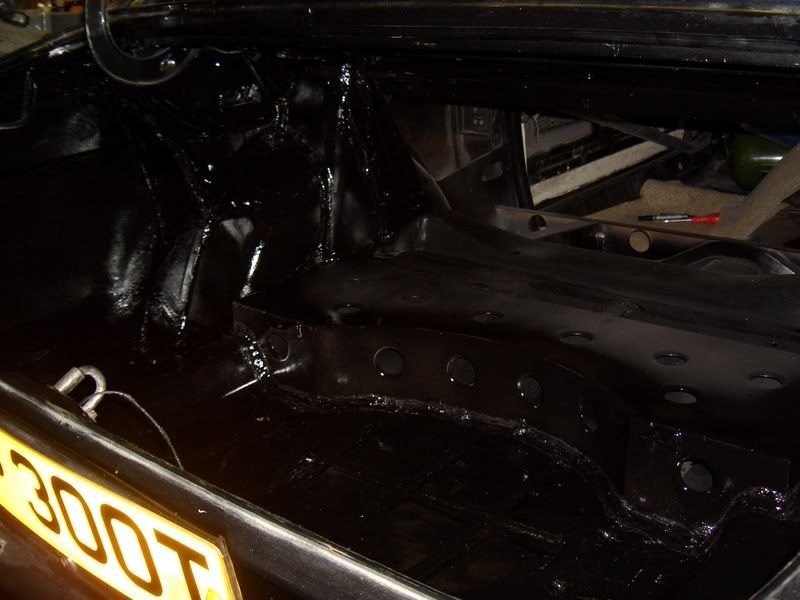
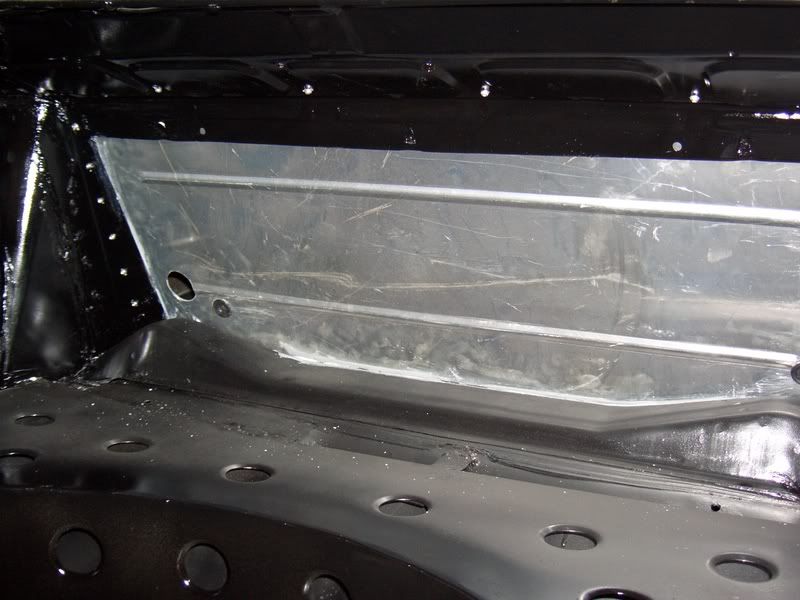
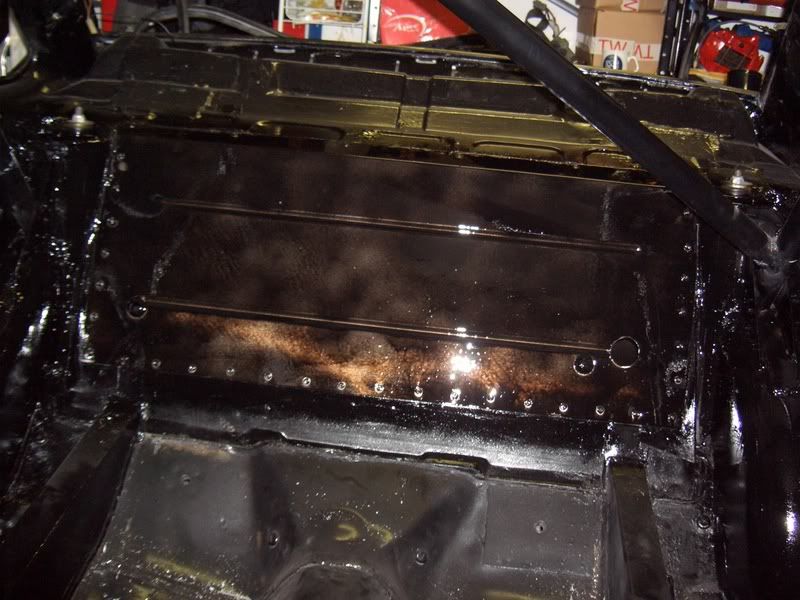
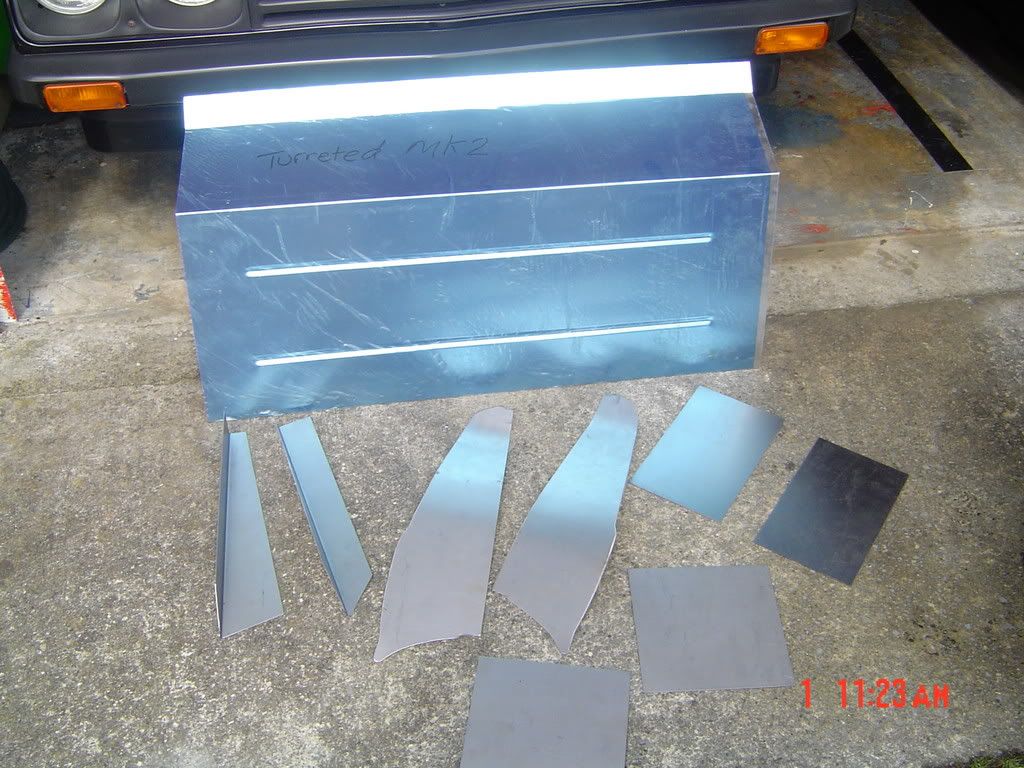
..........however looking at the pics they do not show it as looking to good, probably 'Flash Bounce' as in the flesh the finished job looks great and as FORD may have intended!
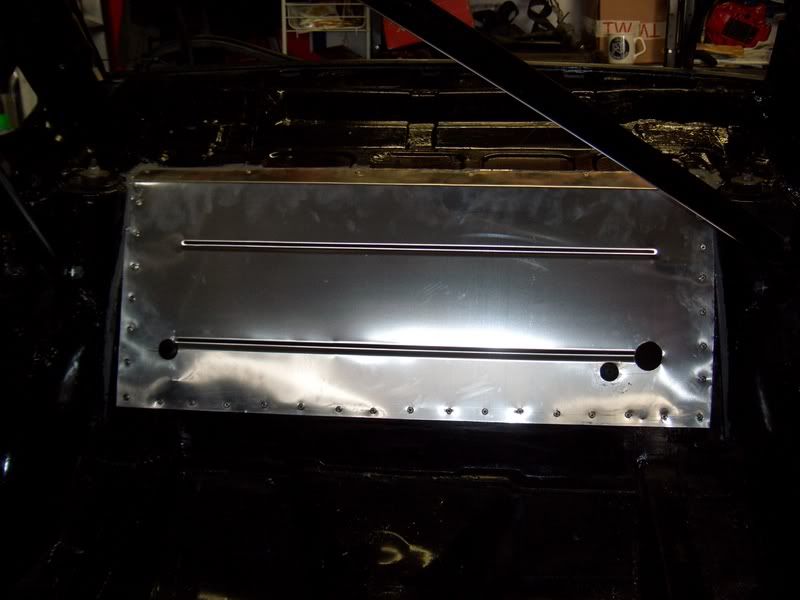

                        view from inside the cabin towards the boot


                        From the boot, prior to fitting the firwall


                        From the Boot with firewall fitted


                        Top of turrets with new fabricated metal, seam sealed and painted


                        Pic of roll cage, turret, finished firwall and rear parcel shelf, finished and ready for the hardboard shelf


                        Finished job, need a little more paint, or not ?


                        Ref the rear parcel shelf area, It is now fully enclosed and compliant, therefore i will refit the original 'hardboard' rear parcel shelf to make it neat and finished off, ala the works cars of the seventies, however as all fixing points have been filled / seam sealed, it may have to resort to some 'No Nails' or similar.

                        The finished pics do not really do it justice, and probably are not indicitive of the work, thought and effort involved in doing this, however it now means that as far as the boot area is concerned i can now proceed with fixings and fittings (so to speak)


                        Now, where are all those alloy shiny Bits.....................


                        cheeRS
                        sigpic

                        Comment


                        • You'll have it finished in no time this way Graham!
                          What kind of rear shocks do you use?
                          Do you have shares in a black paint factory???

                          Comment


                          • ..............as i said the last pic above looks messy but this is due to the light from the flash, in the metal (so to speak) it is a really nice finish.


                            having sent the car off, one area of concern was the Plenum chamber / heater / grill area and this was badly corroded..............


                            However i have had a good look at the repair work done to this area (it was all spot weld drilled away, removed, repaired and repainted) and very happy that this is at least something i no longer have to concern myself with, a good job done here..............


                            note chassis Gusset strengthening plates in place


                            anyway,
                            Back to finishing off the Boot area,

                            cheeRS
                            Last edited by graham John; 01-01-2007, 19:14.
                            sigpic

                            Comment


                            • Originally posted by Miniliteman View Post
                              You'll have it finished in no time this way Graham!
                              What kind of rear shocks do you use?
                              Do you have shares in a black paint factory???

                              Bilstein coil overs with 50llb helper springs

                              Almost, although have more black paint on me than on the car


                              cheeRS
                              sigpic

                              Comment


                              • GJ
                                Are you leaving it with the nose cone on ,originally I wanted the same for mine,then I thought how much it would cost for headlights,wings,etc. and again if I stuff it?
                                What about the gearbox tunnel and seam welding are you doing them yourself ?.Its quite easy if you have a good solid shell as yours is.

                                It's looking good though mate,you'll have 18 months of garage passes to use though,I'm a bit borderline with mine at the moment.However I spent 1/2 day in my garage today cleaning up 4 months of rotten steel ,filler,underseal and dust.Filled 1 and 1/2 dustbins of basically sh1t that was removed from the shell.Got all the main cutting and welding finished now.I'll post some pics when I get all the engine bay in primer(it looks like you've achieved something then)
                                Keep posting the pics as I'm at a simillar position with mine and you might as well make the mistakes and have the learning curve than me. It's been 19 years since my last build and reshell so have to think about things before I dive in and start cutting and grinding.
                                Skids
                                sigpic

                                Comment

                                Working...
                                X